Rain-X for Helmet Visors: Compatibility Guide 2025
Why Rain-X on helmet visors needs a careful approach
Wondering about Rain-X compatibility for your helmet? Here’s the short version: glass formulas are not designed for polycarbonate visors, and the wrong product can cause haze or micro-cracks. The good news is there are plastic-safe water repellents that bead rain effectively without harming your visor or its coatings. In this guide, you’ll learn how to identify a compatible formula, the difference between rain‑repellent and anti‑fog, and a safe, step‑by‑step application method.
What this guide covers
- When Rain‑X‑style treatments are safe (and when they aren’t)
- How rain repellents compare with anti‑fog solutions
- A proven application routine using a soft microfiber cloth
- Care tips that maintain clarity and minimize glare at night
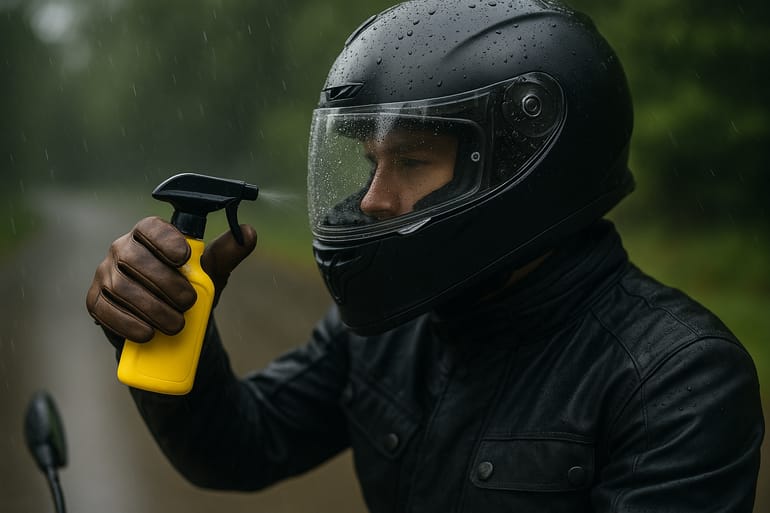
If you ride in wet conditions, beading water off the outer surface helps keep your eyes on the road. But compatibility matters: many visors include hard anti‑scratch layers or an inner anti‑fog insert that demand gentle products. Use the right chemistry and you’ll get crisp water beading with no damage; use the wrong one and you risk crazing, streaks, or peeling coatings. Let’s dial in the safest route to clear, rain‑ready vision.
Is Rain-X safe for polycarbonate visors?
Standard automotive Rain‑X is formulated for glass. Most motorcycle visors are polycarbonate or treated acrylic with hard coats and sometimes inner anti‑fog layers. Solvents found in glass‑focused formulas can attack plastics, leading to crazing, clouding, or weakened edges. For Rain‑X compatibility, only use a clearly labeled plastic‑safe water repellent that specifies suitability for polycarbonate, acrylic, and helmet face shields.
How to verify compatibility
- Check the label for “safe on plastics/polycarbonate.” Avoid ammonia or strong hydrocarbons.
- Test on a small corner near the hinge before full application.
- Do not apply to inner surfaces, Pinlock-style inserts, or tinted/iridium inner coatings.
Red flags to avoid
- “For glass only” or windshield‑only wording
- Harsh cleaners (ammonia, strong alcohol blends) and abrasive pads
- Any product that leaves the visor tacky or hazy after buffing
When in doubt, choose a neutral plastic‑specific repellent or skip chemicals and use a clean hydrophobic microfiber wipe in rain. Your visor’s manufacturer guidance always takes priority—some specify mild soap only. Respect those limits to preserve optical clarity and warranty coverage.
Rain-repellent vs anti-fog: which do you really need?

Rain protection and fog control solve different problems. A rain‑repellent creates a hydrophobic layer on the outer visor so droplets bead and blow off above roughly 50–60 km/h. An anti‑fog solution manages moisture on the inside surface, preventing condensation at low speeds or in cold, humid air.
Quick comparison
- Rain‑repellent (outside): Beads water, better airflow at speed, may increase night glare if over‑applied.
- Anti‑fog (inside): Reduces misting when stopped, often works best as an insert like a Pinlock.
- Together: Outer repellent + inner anti‑fog delivers the most consistent visibility in rain.
Pros and cons
- Rain‑repellent: + Clearer view in heavy rain; − Needs periodic reapplication; − Potential streaks if misused.
- Anti‑fog: + Stable at low speed; − Can require careful cleaning; − Some coatings are delicate.
For most riders, combine a plastic‑safe rain‑repellent on the exterior with a proven anti‑fog strategy inside. Keep chemicals off inner coatings and inserts, and you’ll balance water beading at speed with fog control in traffic.
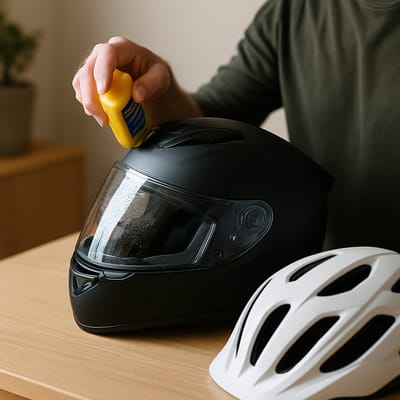
How to apply a plastic-safe rain repellent step by step
Follow this process to maintain Rain‑X compatibility and protect your visor.
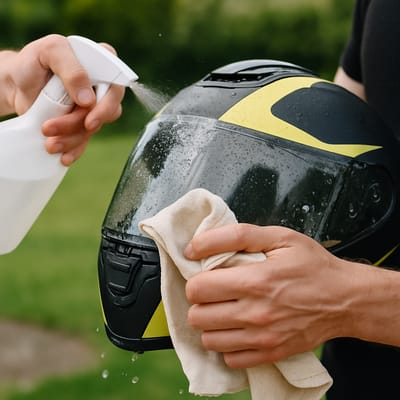
- Clean: Rinse off grit with lukewarm water. Wash with mild soap and a soft microfiber. Rinse thoroughly.
- Dry: Pat dry with a fresh towel. Let air‑dry a minute to remove hidden moisture.
- Mask (optional): If you use an inner Pinlock, open the visor and avoid the inner surface entirely.
- Apply: Using a clean applicator pad, wipe a thin, even layer of a plastic‑safe water repellent over the exterior only. Work in straight lines.
- Flash: Allow the film to haze per instructions (often 1–3 minutes). Don’t rush.
- Buff: Gently buff with a second clean microfiber until crystal clear—no smears.
- Cure: Let it set for 10–30 minutes before riding. Keep it dry during this period.
Pro tips
- Less is more; thick coats cause streaks and nighttime glare.
- Reapply lightly every 2–4 weeks or after multiple washes.
- If streaks appear, cleanse with mild soap, rinse, and rebuff. Avoid harsh solvents.
Care, removal, and safety checks after application

Keeping your visor clear is an ongoing routine. After using a plastic‑safe repellent, adopt gentle maintenance to avoid degrading coatings.
Do’s
- Use mild soap and water for routine cleaning; finish with a soft microfiber.
- Reapply a thin coat when beading weakens or after heavy rain rides.
- Inspect edges and mounting holes; stop use if you notice crazing or haze.
Don’ts
- Don’t use abrasive sponges, paper towels, or strong solvents.
- Don’t coat the inner surface, anti‑fog layers, or Pinlock inserts.
- Don’t stack multiple brands of chemicals—remove old film first.
Safe removal
If you need to start fresh, wash with mild soap and warm water, then buff gently. Stubborn films may lift with a dilute, plastic‑safe cleaner recommended by your visor manufacturer. When visibility matters most—night rides or glare‑prone routes—rebuff to a streak‑free finish or skip chemical layers entirely. Your goal is reliable visor rain protection without sacrificing optical clarity.