Head Circumference Measurement: Expert Sizing Guide 2025
Why measuring head circumference comes first
Measuring head circumference is the single most important step in helmet sizing. A precise number guides you to the right shell and liner, preventing hot spots, lift at speed, or a helmet that rotates too easily. Get this right and everything else—size charts, fit checks, and comfort—falls into place.
Why it matters
- Impact protection works best when the helmet sits stable on the crown.
- Proper head circumference prevents pressure points and rider fatigue.
- Accurate sizing improves ventilation alignment and field of view.
What you’ll learn here
You’ll measure head circumference correctly, translate centimeters to common sizes, and understand differences between street, off-road, and cycling fits. We’ll also cover practical fit criteria—from the five‑minute pressure test to the roll‑off check—so you can confirm a secure, comfortable result. Whether you ride on the road, hit the dirt, or cycle, the process starts the same: a level measurement around the brow, recorded carefully, and verified twice. Expect a snug, even contact that relaxes slightly as pads bed in. If you nail measurement now, you’ll save time on returns and ride safer, longer, and more comfortably.
Step-by-step: measure your head correctly
Tools
- Flexible tailor’s tape (or string + ruler)
- Mirror or a helper
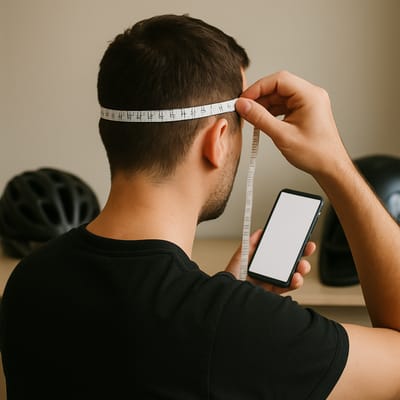
- Notepad/phone to record results
Steps
- Stand upright and relax your jaw. Remove bulky hairstyles or hats.
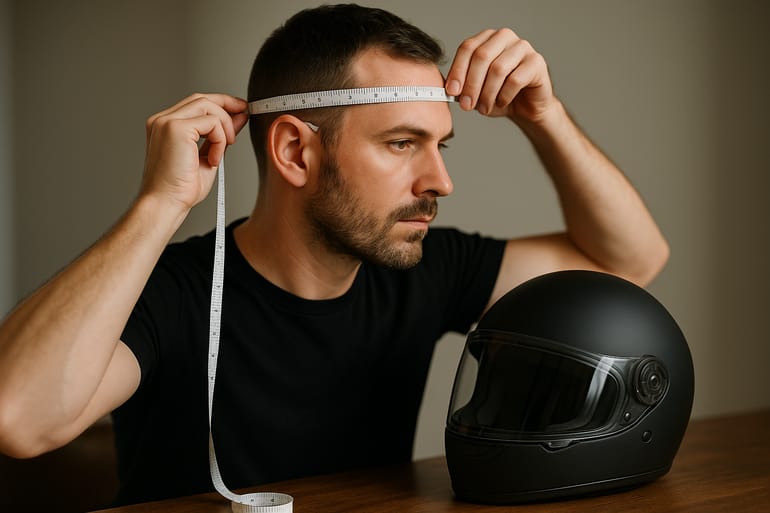
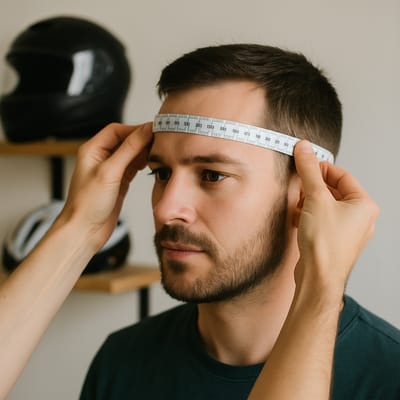
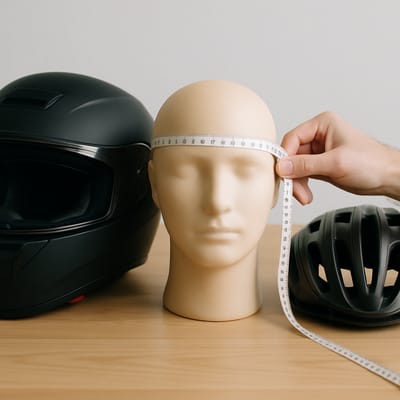
- Place the tape about 1 cm above your eyebrows, passing just above the ears, around the largest part of your skull.
- Keep the tape level all the way around—use a mirror or helper to confirm.
- Pull the tape snug, not tight. You’re capturing true head circumference, not compressing it.
- Take three readings. Record the largest to guide helmet sizing.
- If using string, mark the overlap, then measure against a ruler.
Accuracy tips
- Measure at the end of the day when small swelling can occur.
- Curly or voluminous hair? Compress it as you’d wear it under a helmet.
- Round to the nearest millimeter; small differences matter.
Repeat the process if your numbers vary more than 2–3 mm. A careful approach now ensures your measured head circumference matches the size chart more reliably, reducing guesswork and helping you choose the correct shell and liner combination on the first try.
From centimeters to size: read charts the smart way
Make sense of size charts
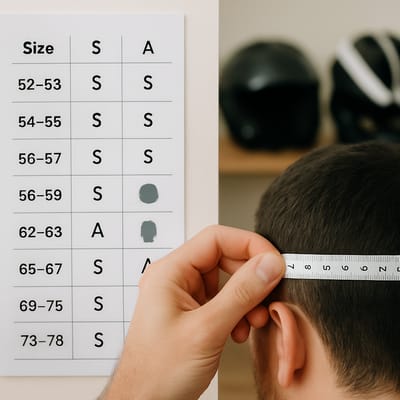
Start with your measured head circumference in centimeters, then find the matching range on the helmet size chart. Charts often overlap (e.g., 58–59 cm), and labels vary (S/M/L vs. numeric). Use these guidelines:
- If you’re between sizes, prioritize crown fit over cheeks—choose the size that hugs the crown evenly.
- Expect a slight break‑in: liners can relax by ~2–3 mm within the first 10–20 hours.
- Some lines offer intermediate sizes or swappable cheek pads/headliners to fine‑tune helmet sizing.
Common pitfalls
- Don’t size up to escape a small pressure point—address shape, not size.
- Shell shapes differ (round/neutral/long oval), which affects how a given cm maps to a label.
- Conversion tables can differ across product lines; always check the specific chart for the helmet you’re considering.
When in doubt, try both adjacent sizes and perform fit checks (below). Your goal is simple: your cm measurement should land you in a size that keeps the helmet stable without creating hot spots, letting ventilation and vision align as designed.
Street, off-road, and cycling: does sizing change?
Key differences by discipline
- Street (full-face/modular): Needs firmer cheek contact to prevent lift and wobble at speed. A precise head circumference ensures stable aerodynamics and quietness.
- Off-road (MX/enduro): Worn with goggles and more body movement. Prioritize secure crown fit with slightly more facial clearance; cheek pads should still be snug for control.
- Cycling: Often uses a retention dial. The shell size is guided by head circumference, then fine‑tuned with the cradle for even pressure.
Practical tips
- Bring your typical eyewear or goggles when testing fit.
- For winter cycling caps or thin balaclavas, re‑measure or allow a small adjustment via the retention system.
- Aggressive off-road riding? Err toward the snug end so the helmet doesn’t migrate on rough terrain.
Across categories, the measurement method is identical: a level, snug tape around the brow. What changes is how you fine‑tune the resulting helmet sizing with pads or retention systems to keep the helmet planted, comfortable, and safe in its intended environment.
Fit checks: confirm comfort, stability, and safety

Quick tests after choosing a size
- Five‑minute pressure test: Wear the helmet for 5–10 minutes. Even, firm contact is good; sharp hot spots mean wrong shape.
- Shake test: Gently shake your head. Minimal movement without strap; even less with strap.
- Roll‑off test: With chin strap snug, try to roll the helmet off from the back—it shouldn’t budge.
- Cheek test (street/off-road): You should feel a light bite into the cheeks and be able to speak without painful pressure.
- Strap check: Two fingers should fit under the strap; no throat pinch.
Final adjustments
If the crown fit is perfect but cheeks are too tight, consider thinner pads. If overall fit is close, remember pads typically ease 2–3 mm. Re‑measure head circumference if results feel inconsistent—small tweaks in measurement can change helmet sizing outcomes. Never choose a loose helmet; stability is critical to keep impact zones aligned during a crash. A methodical check now ensures all‑day comfort and confidence on road, trail, or bike path.