Handlebar Speaker Systems for Motorcycles: Guide 2026
What makes a great handlebar speaker system?
Choosing handlebar speaker systems for motorcycles can feel overwhelming when you’re battling wind noise, rain, and traffic. The right handlebar speaker systems should deliver clear RMS power, real weather protection, and easy controls you can use with gloves. You’ll also want a setup that plays nice with your helmet audio integration and your bike’s electrical system.
What you’ll learn here
- Core specs that matter at speed (power, sensitivity, size)
- IP ratings and mounting that survive weather and vibration
- Wired vs wireless trade-offs for different rides
- Installation basics for bar sizes and power
- Budget tiers and what you actually get for your money
Common pain points solved
If you can’t hear music over 60 mph, fear battery drain, or worry about drilling into wiring, this guide shows how to match handlebar speaker systems to your riding style. By the end, you’ll know which features to prioritize, how to avoid common installation mistakes, and when helmet audio integration is the smarter play for noise control and safety.
Key specs that cut through wind and traffic
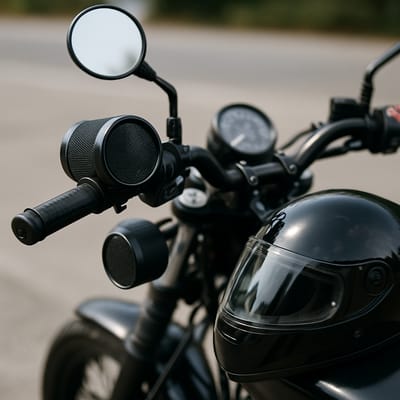
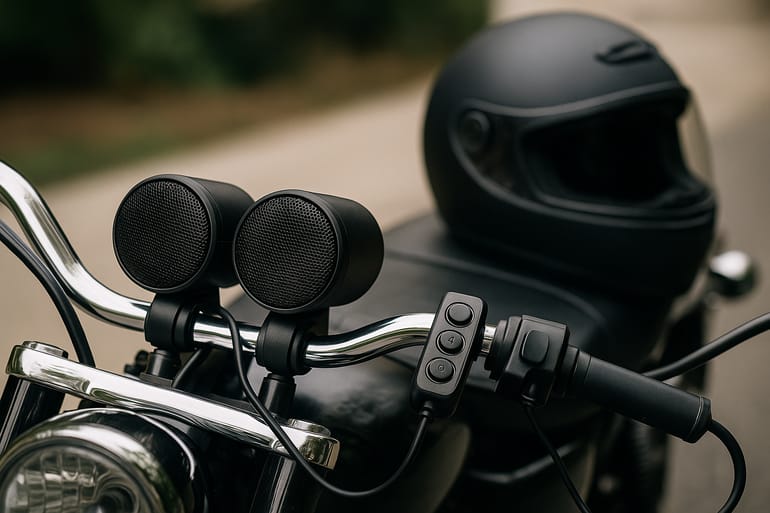
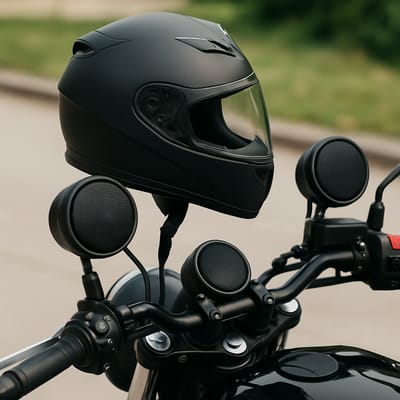
At speed, loudness without clarity is useless. Look for handlebar speaker systems with a true RMS rating (not just peak watts) and a compact amplifier. Sensitivity around 88–92 dB helps make the most of available power; larger 3–4 inch drivers push more air for fuller sound.
Must-have features
- RMS power + amp: Clean output you can hear at 60–80 mph
- Speaker size: 3–4 in drivers balance punch and fit
- Frequency response: Strong midrange for voice/nav clarity
- Bluetooth 5.2/5.3: Stable connection and lower latency
- Glove-friendly controls: Big buttons or bar-mounted remotes
Weather and durability
Wind, sun, and rain punish gear. Choose handlebar speaker systems with IP55–IP66 weather resistance, corrosion-resistant hardware, and mounts that won’t creep on rough roads. Rubber isolators reduce buzz and protect solder joints.
Power options
Hardwire to 12V for consistent volume, or use a battery pack for quick installs. An ignition-switched relay prevents accidental drain. Prioritize these fundamentals and your handlebar speaker systems will stay clear, loud, and reliable without constant fiddling.
Wired vs wireless: which setup fits your ride?
Both approaches work—choose based on ride length, speed, and convenience. Hardwired handlebar speaker systems excel for daily commuting and touring where you need consistent volume and zero charging. Battery-powered options minimize wiring and install fast, but runtime and peak output can be limiting.
Wired handlebar speakers (pros/cons)
- Pros: Stable power, louder with amps, set-and-forget
- Cons: Install time, routing wires, fuse/relay needed
Wireless/battery speakers (pros/cons)
- Pros: Quick install, easy removal, no tapping electrics
- Cons: Charging, less output at highway speeds, theft risk if left on bike
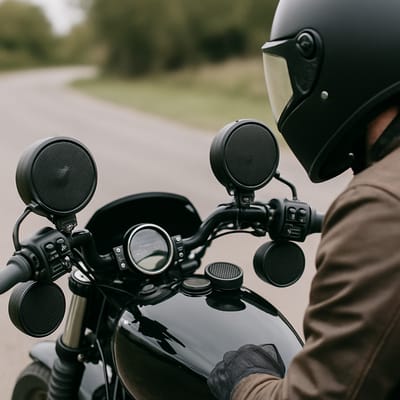
Helmet audio integration
For high-speed rides or full-face helmets, helmet speakers/intercoms keep sound isolated from wind. Many riders use helmet audio for navigation and calls, and handlebar speaker systems for city speeds or parking-lot tunes. A hybrid approach covers all scenarios while keeping volume lower for safety. Match your setup to your typical speeds and whether you ride in rain or store outdoors.
Installation and compatibility without the headaches
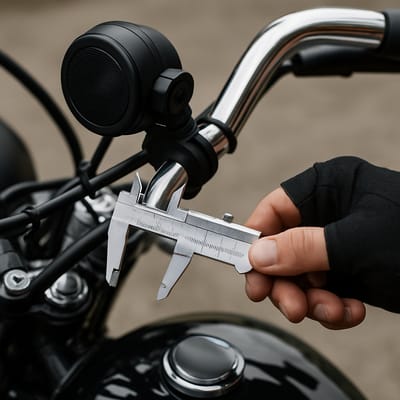
Fit issues and wiring mishaps are the biggest blockers. First, confirm bar diameter: 7/8 in (22 mm), 1 in (25.4 mm), or 1-1/4 in (32 mm) (often stepped near controls). Use the right clamps or shims to keep handlebar speaker systems secure without marring the finish.
Smart mounting
- Leave clearance for levers, mirrors, and switchgear
- Aim speakers slightly toward you to fight wind noise
- Use threadlocker and check torque after your first ride
Power and wiring
- Run a fused line (5–10A) on a clean route away from steering pinch points
- Use an ignition-switched relay or fuse tap to prevent battery drain
- Protect connectors with dielectric grease; heat-shrink all joins
Helmet and safety
Helmet audio integration works best with full-face lids at highway speed; handlebar speaker systems suit urban speeds. Keep volume moderate, obey local noise laws, and avoid controls you can’t operate with gloves. Want a step-by-step? Capture our free wiring checklist and plan your install before you touch a tool.
Budget vs premium: get the best value for your ride

You don’t need to overspend to hear your music. Start with weatherproofing, solid mounts, and enough RMS power. Here’s what to expect as you move up.
What you get by tier
- Entry (under $100): Basic handlebar speaker systems, smaller drivers, limited bass; good for city speeds, fair weather
- Mid ($100–$250): Better amps, IP55–IP66 ratings, cleaner mids; solid daily rider value
- Premium ($250+): Higher RMS power, larger drivers, metal housings, advanced remotes; dependable at highway speeds
Stretch your budget
- Prioritize IP rating and mounting stability first
- Add an inline amp later if you need more punch
- Pair with helmet audio integration for high-speed clarity
If you’re ready to upgrade, compare handlebar speaker systems by RMS power, IP rating, driver size, and control ergonomics—then choose the system that matches your speeds and weather. For help installing, book a pro or follow our checklist for a clean, reliable setup.